
Nothing is more disappointing than buying a new toy, like let’s say a mini bike for example only to have it break after using it only a couple of times. Well, this is exactly what happened to me. After about 2 hours of use my mini bike threw the chain between the clutch and the jackshaft. In this post I will talk about exactly what happened, why it happened, and how I fixed it.
Why it threw the chain.
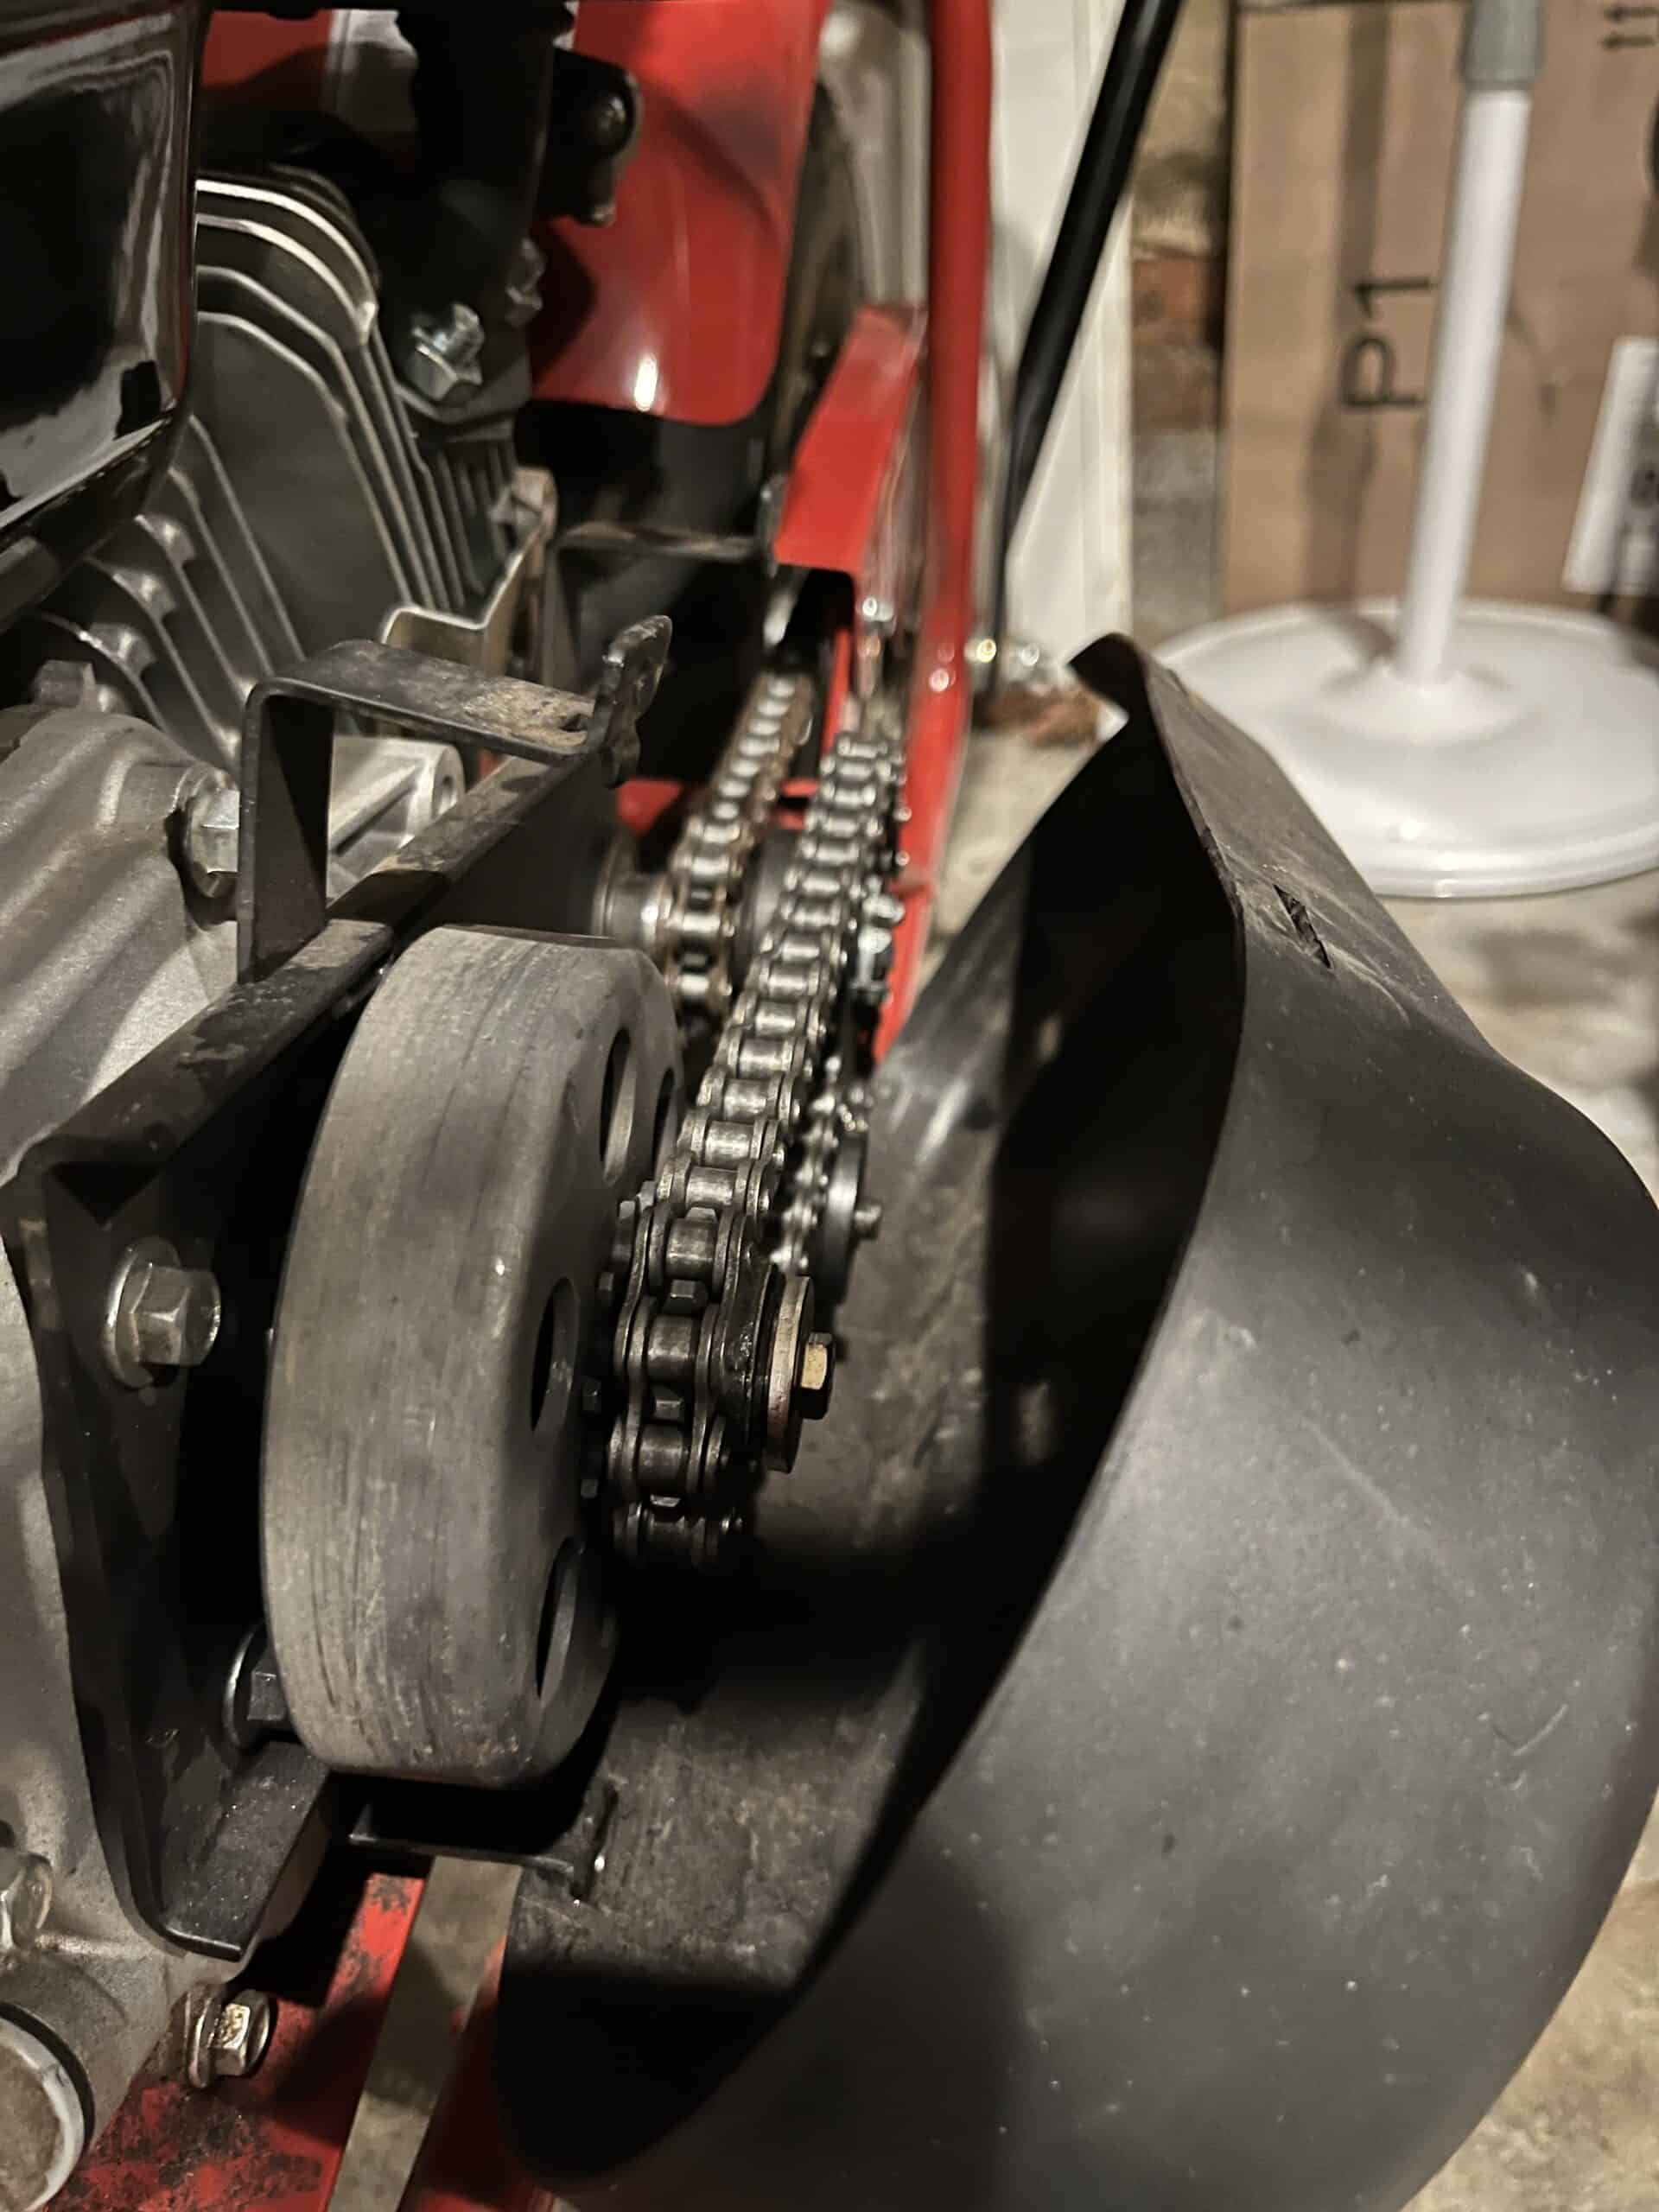
I was out on a camping trip with my family when I decided to take my Coleman CT200U for a little joy ride. I headed off down the road in the direction of the general store. About 5 minutes into my ride, the jackshaft chain went flying off my bike.
I took a quick look and discovered that the master link in the chain had come undone. I walked the bike back to camp to take a better look. After a deeper dive I realized that the real problem was that the jackshaft sprocket did not quite line up with the clutch sprocket or the rear sprocket for that matter.
This jackshaft misalignment put sideways pressure on the chain, eventually causing the master link keeper or plate to pop off. Then with nothing holding the master link in place, it simply slid out and sent the chain flying off into the road.
How to change the alignment of a jackshaft sprocket.
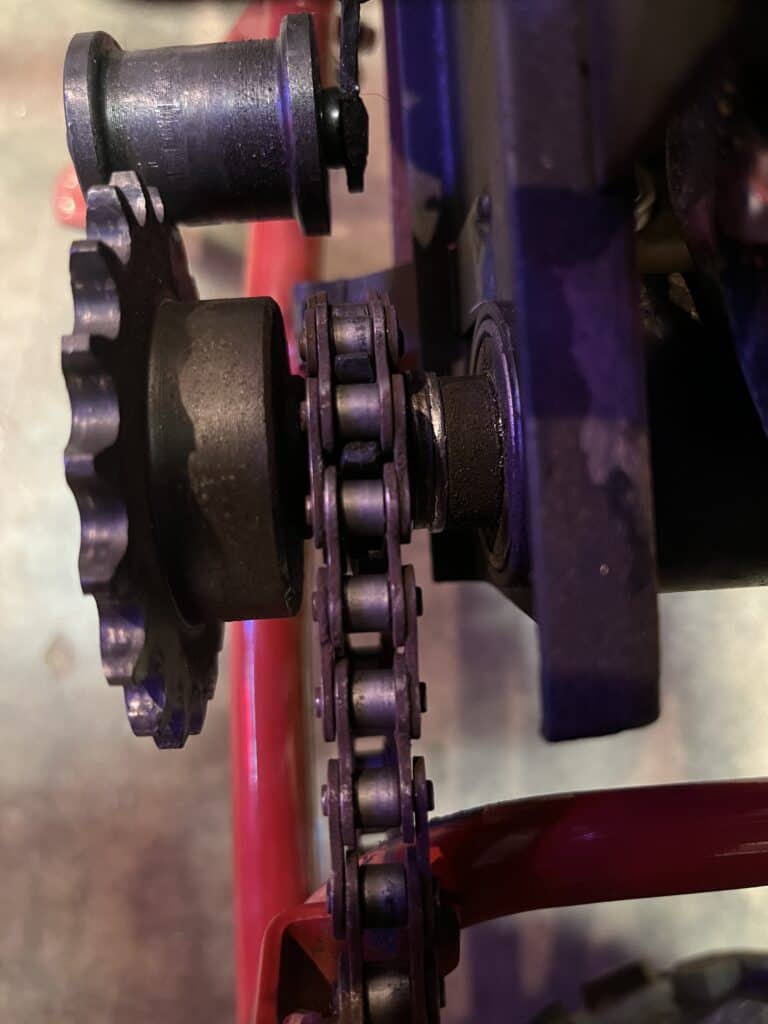
In my case, the jackshaft sprocket was too close to the jackshaft mounting plate. I needed to somehow add a spacer between the sprocket and the bearing that holds the jackshaft in the mounting plate. As it turns out, the mini bike already had a bushing between the sprocket and the bearing, it just wasn’t big enough to align everything correctly.
Here are the steps I took to fix the jackshaft sprocket alignment:
- Remove both chains (if they are still on).
- Remove the castle nut and cotter pin holding at the end of the jackshaft.
- Slide off both of the sprockets and be careful not to lose the square key for the jackshaft.
- Add and additional spacer or bushing.
- Slide on the sprockets.
- Tighten the castle nut and insert the cotter pin.
- Reattach the chains.
Fabricating a spacer or bushing.
It is very important that when you add a spacer or bushing that it is the correct size. This will ensure you avoid other issues caused by rubbing or binding.
There is a bushing that pushes up to a bearing where the jackshaft meets the mounting plate. If you add a spacer, you want to make sure you put it on the sprocket side of that bushing, not the bearing side. The bushing is manufactured to press up against that bearing so that it doesn’t interfere with the bearing’s ability to spin freely.
In my situation, the jackshaft sprocket was out of alignment by about 1/8 of an inch. This doesn’t seem like much and really wasn’t for the chain that ran to the rear sprocket. However, the chain between the clutch and the jackshaft is pretty short and the chain did not have enough play side to side to make up this 1/8 of an inch.
To create my spacer, I used a two washers. I had to do a little bit of fabricating to make them work though. First, I drilled out the center of each washer so they were large enough to fit around the jackshaft. I have a stand-up drill press that made this process much easier. It could be done with a hand-held drill, but it would be much harder to get the hole centered.
I also had to grind down the outside to make the washers match the same outside diameter as the bushing. To do this I used a bench grinding wheel.
Be VERY CAREFUL if you attempt to do this. I used pliers to hold the washers while grinding and a couple of times the grinding wheel still ripped the washers away from me and sent them flying. Another and maybe safer option would be to clamp the washers in a bench vice and use an angle grinder to grind them to size.
Reassembly.
When putting everything back together, you just need to pay attention to make sure it all goes back on in the correct order. The order should be factory bushing, fabricated spacer/bushing, square key, small sprocket, large sprocket, castle nut and then cotter pin.

Once you have the jackshaft assembly back together you can put the chains back on. In my situation, I lost the master link and had to buy another one. I found them where most people find everything; Amazon. I could buy two master links for $3 and spend $10 in shipping for buy 10 master links for $10 with free shipping. So, now I have 9 extra master links just in case something happens again.
In the end, this was an easy and inexpensive fix. I have only put about an hour of riding on the bike, but so far it works great and it’s easy to see that the chains line up much better.