
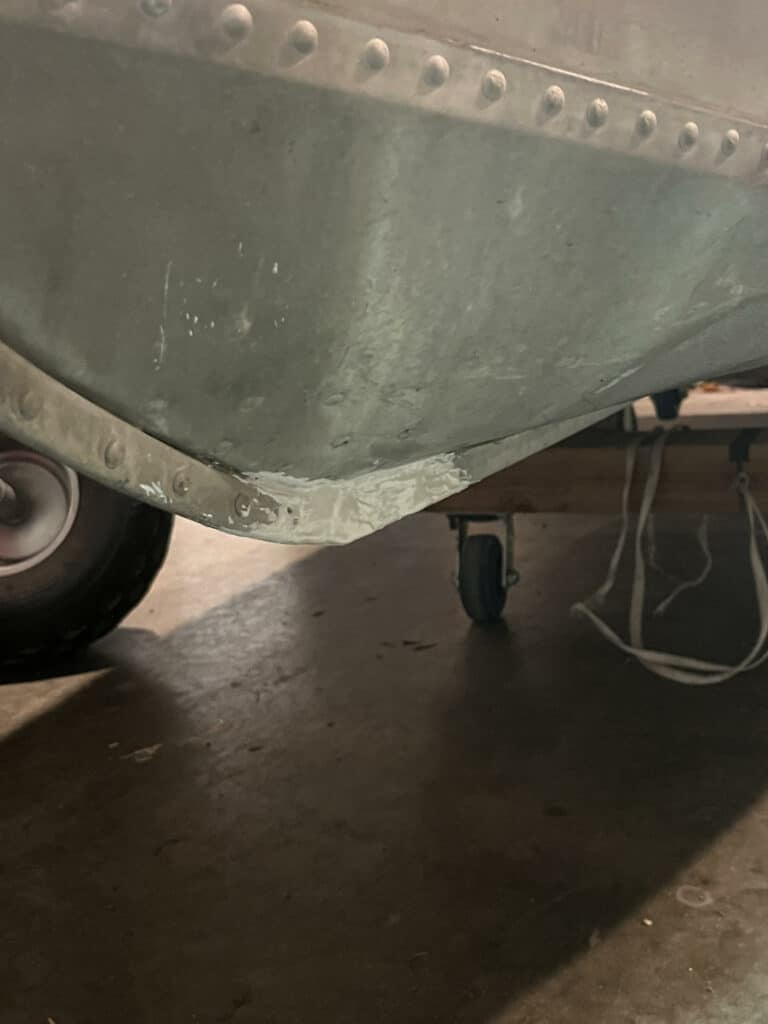
When you buy an older boat, you should expect to have some issues that need addressing. When I bought my project boat, one of the issues it had was a damaged keel. The front portion of the keel right where it starts to curve up to the bow was broken and missing.
I knew this was going to be the first thing I needed to fix. Besides providing some structural support, this portion of the keel is right where the hull would make contact with the shore when beaching the boat. I assume this is how the keel was damaged in the first place.
The previous owner said that it was previously repaired with a piece of hardwood. I knew wood wasn’t going to stand the test of time. Instead I decided I would bridge the gap with a piece of aluminum riveted in place and then further secure it with JB Weld MarineWeld.
Damaged Keel
As you can see from the picture below, there is a section of keel missing. The keel also goes from hollow aluminum hat channel to a ridge that wraps up to the bow. My repair needed to work as a transition between these two different shapes.
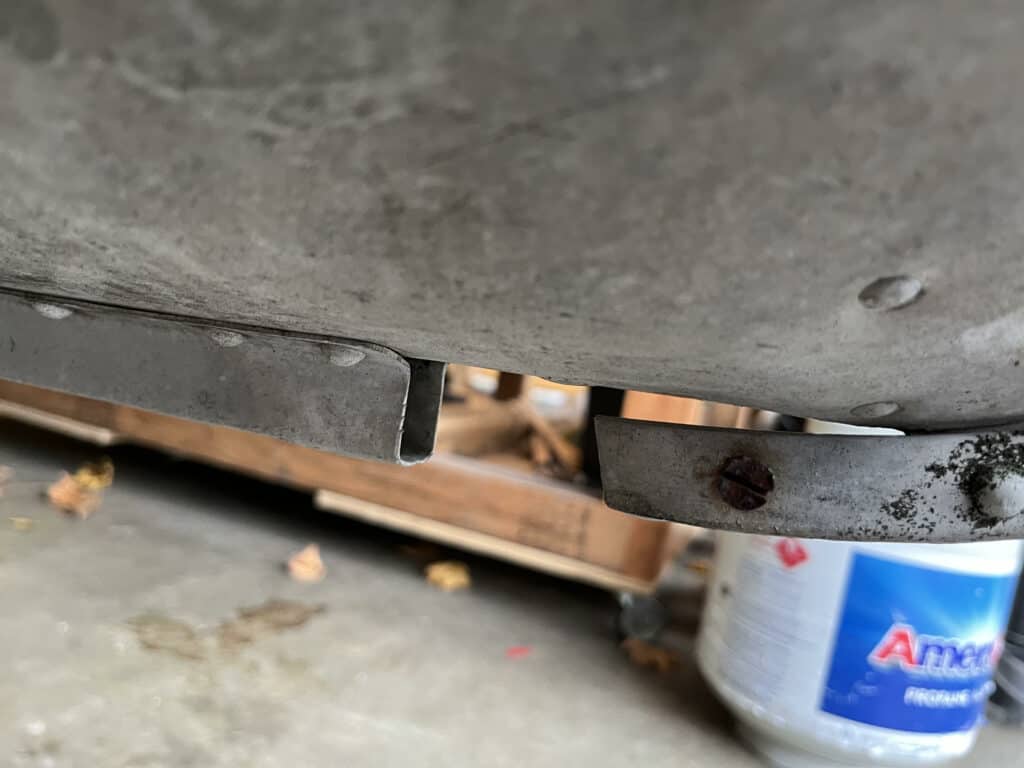
As you can see in the picture above, there is an old screw in a hole in the ridge that wraps up to the bow. I was able to use this pre-existing hole as part of the keel repair. I also took advantage the open end of the keel when installing the new keel piece.
Design and Template
This section of keel is the portion that will hit the shore first and take the brunt of the impact. So, it was important that the end product was strong enough to handle beaching the boat. The repair had to be at least as strong as the rest of the keel and preferably stronger.
It was also important that it was smooth. I couldn’t have any sort of lip or extrusion that could catch on rocks when beaching or snag on debris while in the water. I decided that it was best to make it watertight as well. Water running through the bottom hull piece probably wouldn’t affect performance, but I didn’t want to take any chances or create a space that could get packed full of sand and rocks.
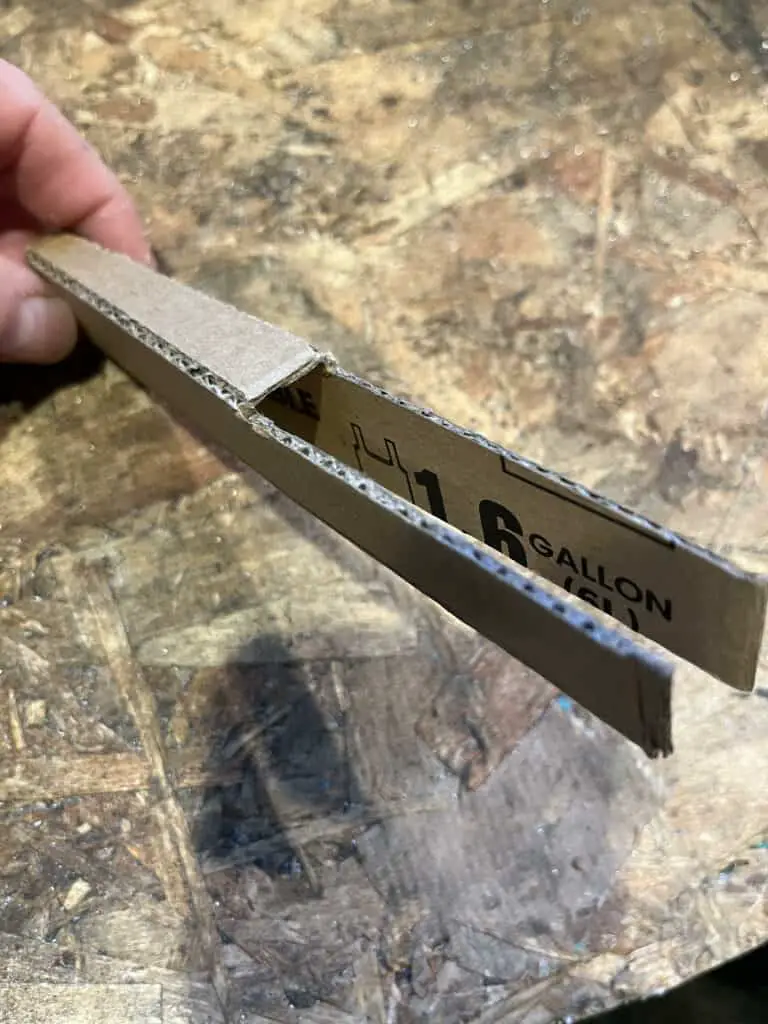
The design I settled on was a sort of U shaped piece of aluminum that wrapped around the bow ridge and slid inside the end of the open keel. I riveted the front of the new keel piece in place through the existing hole in the bow ridge.
I decided a piece of the 1/16th inch aluminum from the center seat I removed from the boat was the best material to use. It was available, free and the same material as the rest of the keel. I figured that if it worked for the rest of the keel for the last 55 years, it was good enough to me.

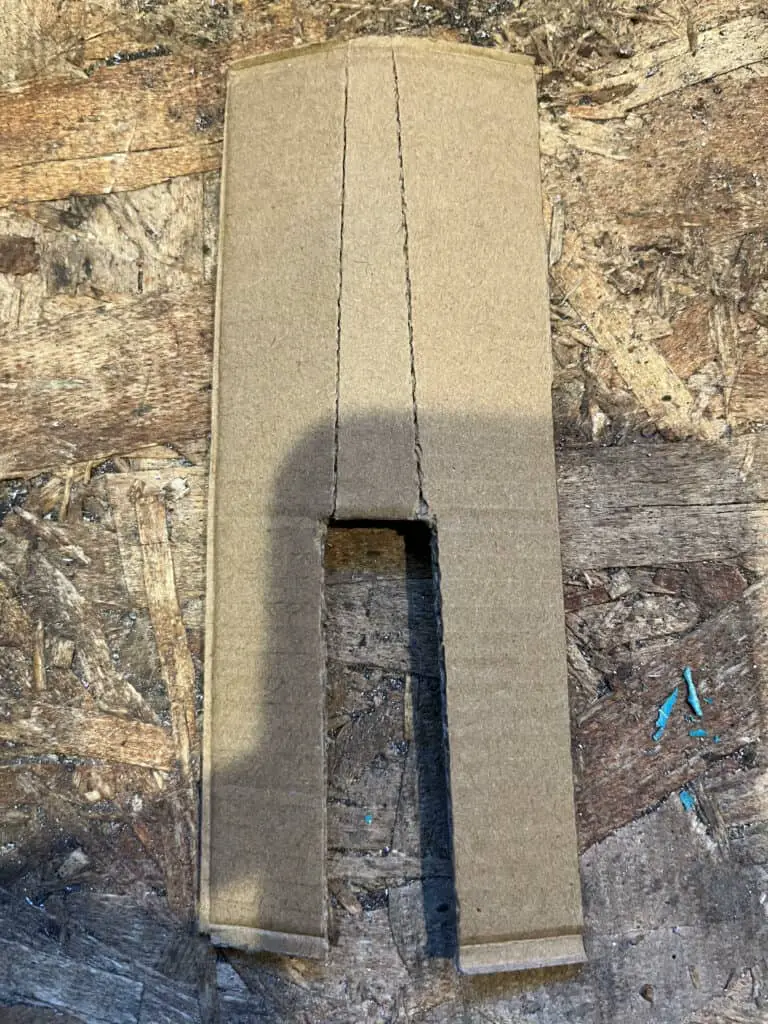
In the picture above, the red lines represent the new aluminum keel piece and how it will fit once it is installed.
The tricky part was making sure that my new keel piece was the perfect size and shape. To make sure I got this right, I made a cardboard template and test fitted in place. This was a little bit of a process of trial and error to get it just right. Once it fit the way I wanted it, I traced the template out on the aluminum.
There wasn’t any tricky angles, so cutting the aluminum was pretty easy. I don’t have a metal brake, so bending it to the correct angle was a little more difficult. I used a vice, hammer, crescent wrenches and channel locks to bend it into place.
The first bend when pretty well because it was just a basic 90 degree bend. I clamped the aluminum in the vice right along the guide line I drew on the aluminum and then used the crescent wrenches and eventually the hammer to make my bend.
The second bend was a little harder to do. It was another 90 degree bend so I thought I would just repeat the process and call it a day. The problem was that the second bend was so close to the first bend that it didn’t have enough space to clear the top of the vice. As I started to make the second bend the tab created by the first 90 degree bend quickly hit the top of the vice.
To finish the bend, I took a wooded block that was the right thickness and put it between the first and second tab and then clamped it in the vice. This forced the aluminum to bend around the block and completed the bend. This worked, but the second bend was more rounded and not the clean 90 degree bend that I got the first time.
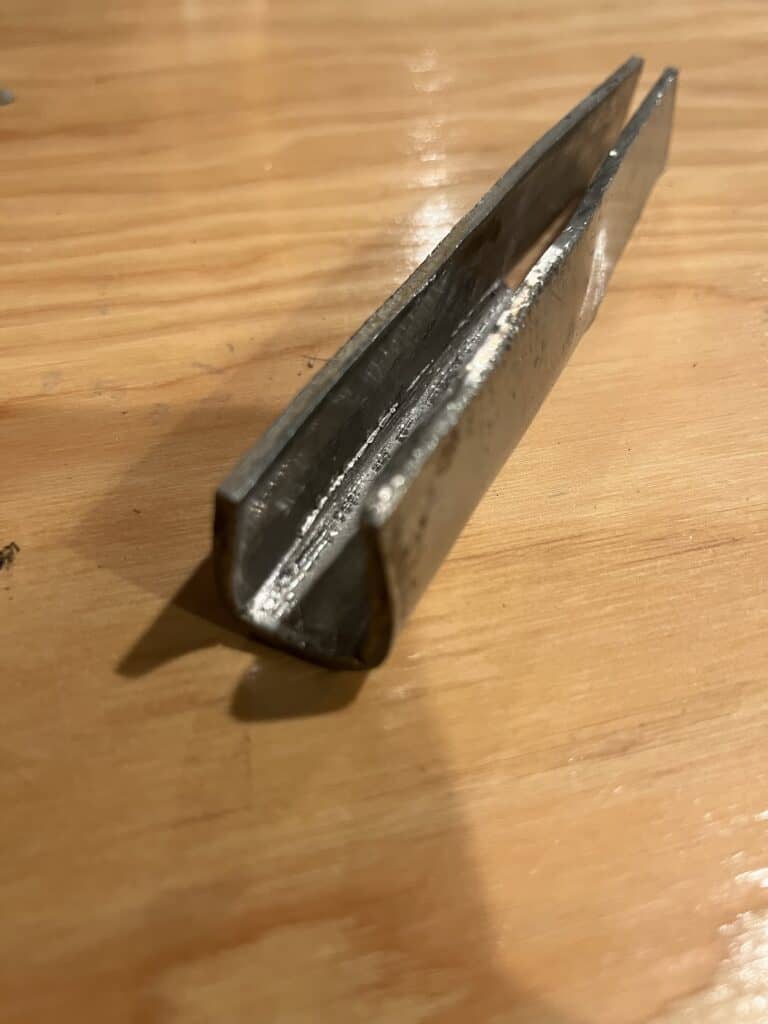
I originally made the new keel piece out of stainless steel, but then realized this was a bad idea because stainless steel causes aluminum to corrode. The picture above is of the stainless steel keel piece I made and shows the imperfect second bend.
In the end, after a little further manipulation the new keel piece fit nice and snug. I decided once the piece was installed, no one was really going see the bottom of the boat anyway, so it didn’t really matter that the second bend was a little rounded as long as it fit.
Install
To install the keel piece, I slid the two tabs I created into the opening at the front end of the keel. It was a very snug fit and I couldn’t push it all the way in place by hand. I used a rubber mallet and a block of wood to hammer it the rest of the way. This worked pretty well and I was able to get in place without damaging anything.
As I mentioned above, there was a hole already drilled through the bow ridge that I planned on using to secure the keel piece in place. The problem was I couldn’t see where the hole was with new piece in place.
To get around this and determine where I needed to drill, I measured from the end of the keel and the bottom of the boat to the center of the hole. Once I installed the new piece, I used these measurements to drill through either side so that the holes lined up with the ridge hole.
I used an aluminum pop rivet to rivet the piece in place. In the end the pop rivet did not add very much structural support, but it secured the piece while I applied the JB Weld MarineWeld. This is what really provided the structural support. I
f you haven’t ever heard of JB Weld, you’re missing out because this stuff is really useful when it comes to making repairs. JB Weld MarineWeld is a two-part epoxy that bonds to almost any surface and creates strong and durable bond. Once it cures it can be sanded, drilled, or even tapped.
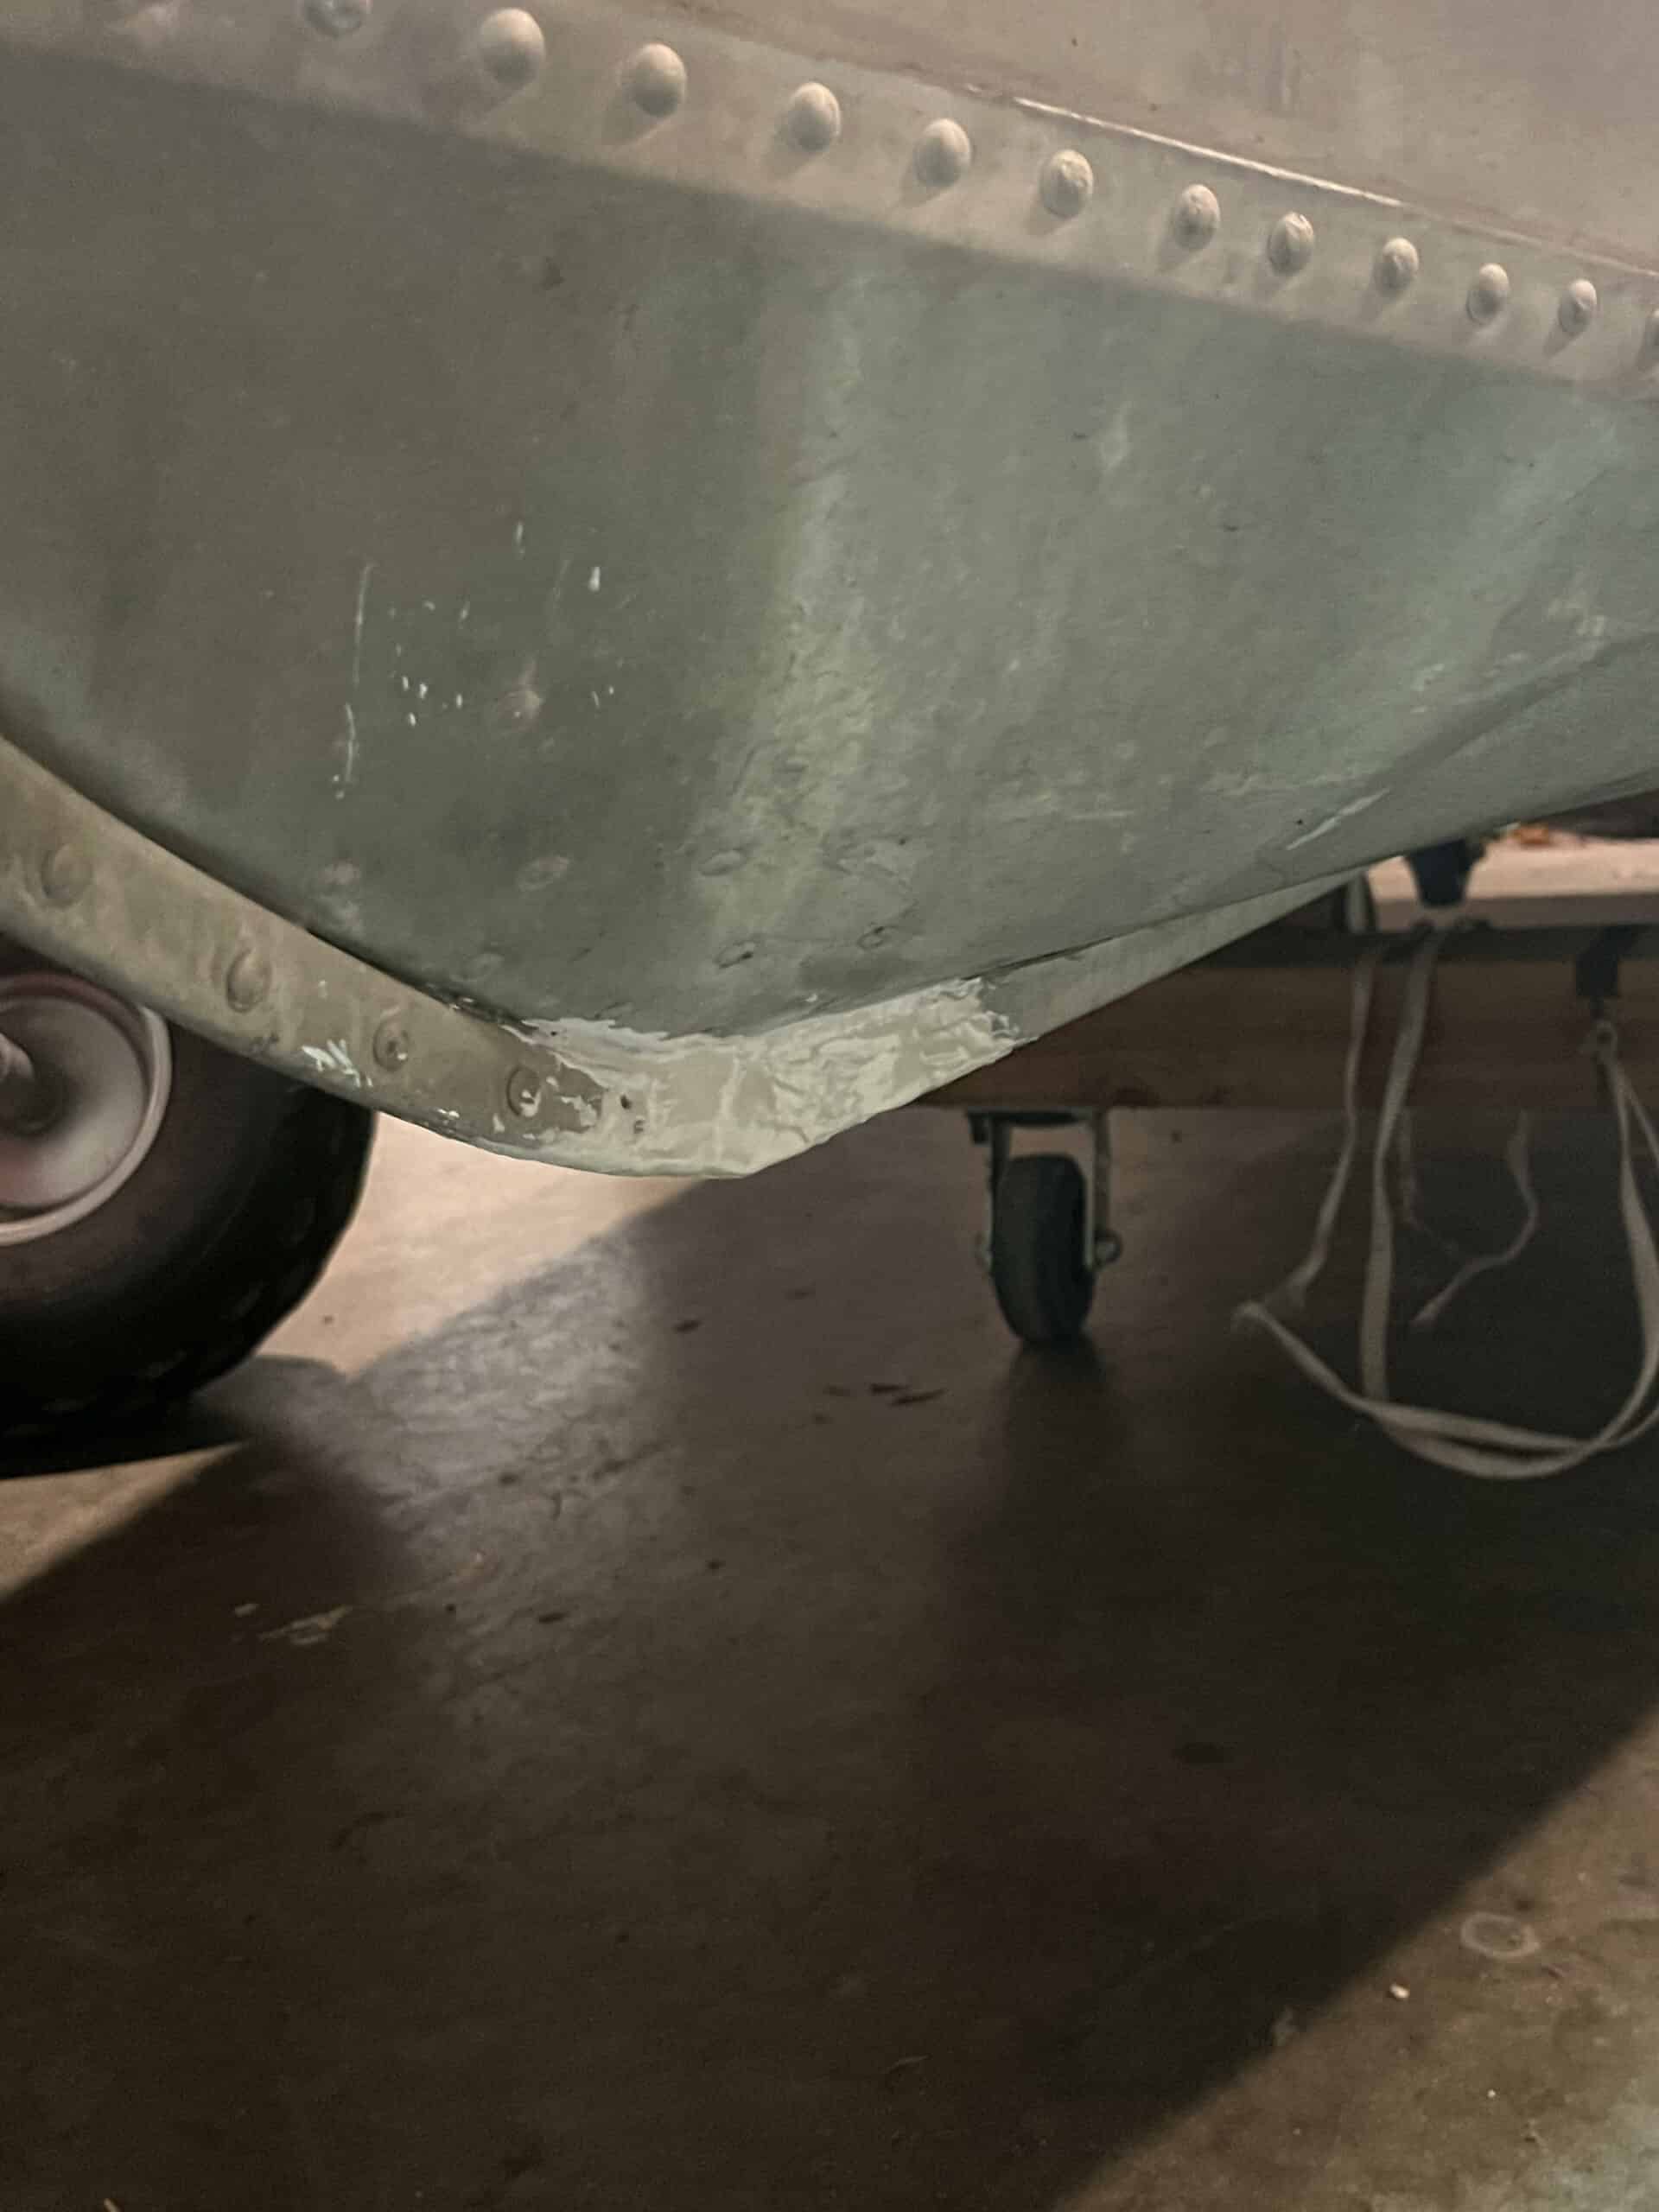
I covered the entire keel piece with JB Weld and overlapped on to the bow ridge and keel. This not only added the much need structural support, but also provided a watertight surface. I was even able to sand it smooth after the JB Weld cured.
In the end I was happy with the outcome. I am confident that this portion of the keel is stronger than the rest and can easily handle the boat being beached. As you can see from the picture, the patchwork clearly stands out, but no one will see it when it’s in water. Plus, I can always paint the outside of the boat and then you won’t be able to tell it was ever repaired.
